Saturation is one of the fastest ways to make a mix feel finished. It adds harmonics, gently rounds off peaks and pulls parts forward. But put one saturator across a full mix and push it, and you hit the same wall every time: the low end gets woolly before the top end gets exciting.
A multiband saturation plugin fixes that. This guide covers what it does, when it beats a single-band saturator, and how to set one up on a bus, a stem and the master without fooling yourself along the way.
What a multiband saturation plugin actually does
A regular saturator treats the whole signal as one thing. Everything goes through the same nonlinear stage at the same drive, so the loudest part of the spectrum decides how hard the circuit works. On most modern material that loudest part is the low end. The kick and bass hit the saturator first and hardest, and the rest of the mix gets whatever is left.
A multiband saturation plugin splits the signal into frequency bands and saturates each one separately. At RSL we call this dual-core (multiband) saturation: two independently driven saturation cores split at a crossover you set. That lets you keep the low end composed while pushing the top hard, or do the reverse when a thin mix needs weight.
The practical benefit is simple. Intermodulation between a big bass note and a bright vocal is a large part of what makes heavy full-band saturation sound smeared. Separate the bands and you can add a lot more character before things fall apart. For a deeper look at the idea, see our dual-core saturation explainer.
Single-band vs multiband: when to reach for which
Stick with a single-band saturator when…
- You’re working on a single source with a narrow range, like a snare, a vocal or a guitar DI.
- You only want a touch of glue and aren’t pushing anything hard.
- You want the low and high end to react together, the way a hardware unit patched across a bus would.
Reach for dual-core (multiband) saturation when…
- The low end gets muddy or starts pumping before the top gets any excitement.
- You want density and weight in the lows and bite in the highs, which means different amounts of drive.
- You’re working on a drum bus, a music stem or a master, where kick and bass share the processor with everything else.
- A mix sounds dull, but an EQ boost just sounds brighter instead of more alive.
Where to set the crossover (and why)
The crossover decides which parts of the signal each core sees, so it matters more than any character setting. Some starting points:
- Full mix or master: start around 120 to 200 Hz. Everything under the split holds kick and bass fundamentals, so you can keep that core clean while driving the rest.
- Drum bus: start around 150 to 250 Hz so the kick body lands in one core and snare crack, room and cymbals land in the other.
- Vocal or instrument stems: try a higher split, around 2 to 5 kHz, when you want presence and air without thickening the chest of the sound.
- Bass stems: a split around 100 to 150 Hz lets you add upper harmonics that help bass read on small speakers while the sub stays solid.
Sweep the crossover while listening, not while watching a meter. You’ll hear a spot where the low end suddenly tightens up and the drive on the upper core starts to sound exciting instead of harsh. That spot is usually right.
One detail worth knowing about the RSL Dual Core Saturator: Core 2 is a residual saturator. It isolates a frequency band, processes it, subtracts the original band, and blends only the difference back with the dry signal. So Core 2 adds what the saturation changed instead of replacing that band outright.
Insert or parallel?
You can run saturation fully on the insert or blend it in parallel. Both have their place.
- Insert (100% wet): the whole signal takes on the character, including the peak rounding. Good for obvious color on stems and for tape or console-style glue at low drive.
- Parallel: the dry transients stay intact and the saturated signal fills in behind them. Good for drums, and for masters where you want density without losing punch.
A useful habit: push the drive further than sounds right at 100% wet, then pull the wet control back until it sits. You’ll often get more character with fewer side effects than moderate drive fully wet.
Gain staging before you drive anything
A saturator reacts to input level. If you feed it a signal peaking near 0 dBFS, the drive control is already half used up before you touch it. As a starting point, aim for peaks around -18 to -12 dBFS going in, then use the drive controls to decide how hard it works.
That’s also why a preset that sounds great on one session can sound broken on the next: the input level changed, so the preset is doing something else. Trim first, then shape.
Oversampling and aliasing
Saturation creates new harmonics, and some of them land above the Nyquist frequency (half the sample rate). In a digital system those frequencies don’t disappear. They fold back down as aliasing, which is inharmonic and tends to sound grainy or brittle, especially on bright material pushed hard.
Oversampling runs the processing at a higher internal sample rate, filters out the ultrasonic content, then converts back down, which greatly reduces aliasing. The cost is CPU and sometimes a little latency. A sensible workflow:
- Leave oversampling off or at 2x while building a mix across many tracks.
- Use 4x or 8x on buses and the master, and before a final bounce, especially with heavy drive on the top band.
- Compare with your ears. At low drive the difference can be subtle; at high drive on cymbals and vocals it usually isn’t.
If you’re curious why digital saturation often needs this kind of care to sound musical, read Why Digital Saturation Needs Analog Attitude.
Setting one up on a bus, a stem and the master
On a bus (drums, music, backing vocals)
- Trim the input so peaks sit comfortably below full scale.
- Set the crossover just above the kick’s body.
- Keep the low core’s drive modest. Push the upper core until the snare and room start to bloom.
- Pull the wet level back until transients feel as punchy as the bypassed signal.
On a stem (bass, vocals, synths)
- Decide what the stem is missing: weight, presence or air.
- Place the crossover so the part you want to change lives in its own core.
- Drive that core harder and leave the other one close to clean.
- Check it in the full mix, not solo. Saturation that sounds great solo often sounds too big in context.
On the master
- Start subtle. Low drive, crossover in the 120 to 200 Hz area, wet well below 100%.
- Use tone shaping with care. A small tilt toward air or body goes a long way on a full mix.
- Turn oversampling up.
- If the saturator has a ceiling control, set it so the output never overshoots what your limiter or delivery spec expects.
For more detailed recipes, see How to Use Dual-Core Saturation on Buses, Stems and Masters.
Compare at matched loudness, not matched peaks
This is the single most important habit with any saturator. Saturation lowers crest factor: peaks come down relative to the body of the sound. So at the same peak level, the saturated version is louder, and louder almost always wins an A/B for the wrong reason.
Match the processed and bypassed signals on integrated loudness (LUFS), not peak level, before you decide whether the saturation is helping. It’s the same reason RSL level matches its own demos on integrated loudness. If a setting still sounds better once the loudness is equal, keep it.
Common mistakes
- Driving the low band as hard as the top. That throws away the whole point of splitting the signal.
- Setting the crossover by habit. A split that works on a sparse mix may cut right through a busy bass line.
- Judging louder as better. Level match first, every time.
- Stacking saturators without checking the sum. Three subtle stages on the track, bus and master can add up to one heavy one.
- Ignoring aliasing. If the top end turns brittle as you push, try more oversampling before you reach for less drive.
The RSL option: Dual Core Saturator
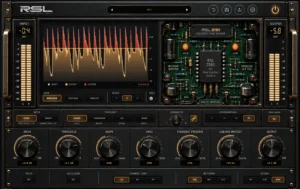
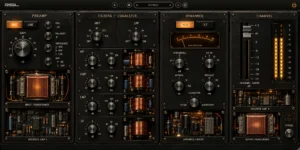
We built the RSL Dual Core Saturator for exactly this job. RSL was founded by producer and engineer Mevin Riviere (2x RIAA Gold, 15+ years making records), and the plugin reflects how saturation actually gets used on sessions.
- Two independently driven cores split at a crossover you set, with Core 2 working as a residual saturator.
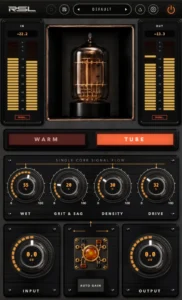
- Seven characters: Warm, Tube, Clip, Tape, Ferro, Ionic and VO2.
- Controls: Wet (parallel saturation level), Depth (grit and sag), Density and Drive (tube intensity), plus Tilt (body/air) and Focus (mid/side) tone shaping.
- Character extras: Blue and Red transformers, console treatment, Voltage L/R drift and a true-peak ceiling.
- Workflow: Bus, Stem and Master job modes, Push and Match mix laws, and oversampling off, 2x, 4x or 8x.
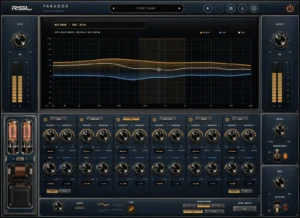
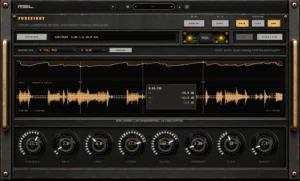
- Metering: spectrum, harmonic content and RTA, with gain match and residual monitoring so you can hear what the processing adds and compare fairly.
It runs on macOS 11+ (Universal 2) as Audio Unit, VST3, AAX (Pro Tools, from version 1.9.0) and Standalone, and on Windows 10/11 64-bit as VST3 and Standalone. The founders’ price is $69 until 30 November 2026, then $99. That’s a one-time payment, it activates through RSL Hub on up to 4 computers, and there’s a 14-day refund window.
Try it first: the free 14-day trial is the full plugin on up to 4 computers, no card required (you just need a free account). Put it on your drum bus, sweep the crossover, level match, and decide with your ears.
Want to start with a single core? RSL One is free and uses the same Warm and Tube circuit. Our RSL One guide shows how to get going.
FAQ
Is multiband saturation the same as dual-core saturation?
Dual-core saturation is our name for a two-band approach: two independently driven saturation cores split at a crossover. It’s a form of multiband saturation, built around the most common need, which is treating the low end differently from everything above it.
Should I use a multiband saturation plugin on the master?
It can work very well there, because it lets you add density and presence without the low end dragging the whole mix into distortion. Keep the drive low, raise oversampling, set a ceiling, and always compare at matched integrated loudness.
Where should I put saturation in the chain?
A common starting point is after corrective EQ and before final compression or limiting, so the saturator reacts to a cleaned-up signal and the dynamics stage catches what it adds. Try it both before and after your bus compressor, though. Both orders are valid, and they feel different.