Drive a full-range bus into a single saturation stage and the low end decides what happens. Bass holds most of the energy, so it reaches the nonlinear part of the circuit first and dominates the harmonic output. By the time the cymbals and air have taken on any color, the kick has already smeared.
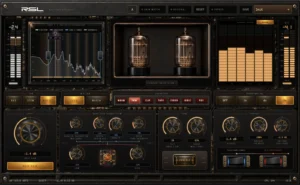
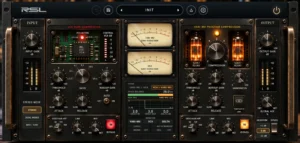
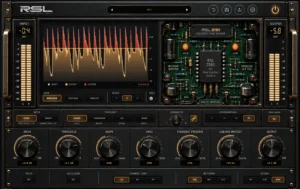
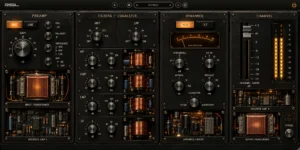
That is the problem the Dual Core Saturator is built around. It splits the signal at a crossover you place yourself and drives each band through its own independent saturation core, then recombines them through a shared console output stage. The low end can stay composed while the top is pushed hard, or the reverse if that is what the record needs.
This is a practical guide to setting it up on buses, stems and masters.
The signal flow, in order
Everything makes more sense once the topology is clear:
- Input with metering and gain staging
- Crossover splits the signal into two bands at a frequency you choose
- Core 1 and Core 2 saturate their band independently: separate character, separate drive
- Recombination through the console output stage
- Tone shaping with Tilt and Focus
- Output stage with transformer voicing, voltage drift and true-peak ceiling
Two consequences worth internalizing. First, the crossover is upstream of everything, and moving it changes what both cores are being fed. Set it before you tune drive. Second, the output stage is shared, which is what stops band-split processing from sounding like two unrelated plugins bolted together.
Set the crossover before anything else
The crossover point is the most consequential control in the plugin, and it is the one most people skip past on the way to the character buttons.
Ask what you are protecting. On most material the answer is the low end: you want weight without the kick and bass turning to porridge. Placing the split somewhere in the low mids gives Core 1 the fundamentals and Core 2 everything with definition in it. Somewhere around 200–300 Hz is a reasonable starting point on a full mix; drum buses often want it lower, around the point where the kick’s body ends and the snare’s crack begins.
Then move it while the audio plays. The right point is usually audible as a moment where the low end stops flapping and the top opens up. If you cannot hear the split doing anything, push one core’s drive up temporarily to exaggerate the difference, find the boundary, then bring it back down.
Choosing a character per core
There are seven characters: Warm, Tube, Clip, Tape, Ferro, Ionic and VO2. They are not seven flavors of the same curve. They are different behaviors, so the useful question is what each one does to your material rather than which is “best”.
The four familiar ones are the ones to learn first. Warm and Tube cover the ground most sources want: added density and upper harmonic content without a dramatic change to the envelope. Clip is the most surgical, useful when you want peak control that reads as level rather than as compression. Tape brings envelope behavior with it, rounding transients and carrying energy forward in a way the others do not.
Ferro, Ionic and VO2 come from behaviors that were never available in a rack: ferrofluid response, ionic systems and phase-transition materials. They are worth exploring once the familiar four have stopped surprising you, particularly on sources that need to sound distinctly unlike everything else in the arrangement.
The pairing matters more than either choice alone. A common and effective combination is something restrained on the low band and something more assertive above it, so the bottom stays defined while the top takes the character. Running the same character on both cores at different drive levels is also legitimate, and gives a more homogeneous result when cohesion is the goal.
Job modes: Bus, Stem and Master
Job modes tailor the processing to where the plugin sits in the chain, and setting this correctly first saves a lot of fiddling later.
- Bus: group processing. Drums, guitars, a vocal stack. The most permissive of the three; this is where you can push.
- Stem: larger submixes heading toward a final balance, where you want character without committing to a master-bus level of restraint.
- Master: the full mix. Tightest tolerances, because everything downstream inherits whatever you do here.
Pick the mode that matches the actual position in your chain rather than the one that sounds most exciting. If Master feels too conservative for what you are trying to do, that is usually a sign the work belongs on a stem instead.
Push and Match: two mix laws
The blend between dry and saturated signal is governed by a mix law, and the choice changes what the wet control means.
Push lets the processed signal add level as you blend it in. Saturation adds density and the sum gets louder, which is often exactly what you want when the goal is weight and forward motion.
Match compensates so the blend stays at a consistent level. This is the setting for making decisions. Louder reliably sounds better, and if you are auditioning wet levels in Push you will keep choosing more, because more is louder. Set the character in Match, confirm the decision, then switch to Push if you want the level.
Habit worth building: dial in Match, commit, then move.
Tilt and Focus
Two shaping controls sit after recombination.
Tilt moves the balance between body and air, a broad tonal pivot rather than a surgical band. Saturation adds upper harmonics, so a heavily driven signal often needs a small amount of Tilt toward body to stay balanced. Use it to correct the tonal shift the cores introduced, not as a replacement for your EQ.
Focus works on mid and side. Distortion tends to build in the center, where correlated content sits, so pushing hard can narrow a mix. Focus is the counterweight. Small movements do a lot, and it is worth checking the result in mono, because anything you gain in width that collapses when summed is not width, it is phase.
The output stage
Three controls determine how the recombined signal leaves.
Blue and Red transformer voicings are two different output characters, plus a Console treatment. Audition them last, once drive and blend are set, because the difference is a finishing decision and it is easy to mistake it for a bigger change than it is when the rest is still moving.
Voltage L/R drift reintroduces the small channel-to-channel inconsistency that real hardware could not avoid. Modest amounts read as width and movement; large amounts read as a problem. Check in mono.
Ceiling is true-peak limiting, and it matters more than the number in your DAW’s meter suggests. Inter-sample peaks that read as legal at 44.1 kHz can clip once a lossy encoder reconstructs the waveform. If a master is going to a streaming platform, set the ceiling with that in mind rather than pushing to 0 dBFS.
Oversampling: off, 2×, 4×, 8×
Saturation generates harmonics above the input frequency. At normal sample rates some of those harmonics land above Nyquist and fold back down into the audible band as inharmonic content, or aliasing. It reads as a brittle, slightly metallic edge, and it is worse on bright material and heavier drive.
Oversampling runs the nonlinear stages at a higher internal rate so the harmonics have room. The cost is CPU and a small amount of latency.
A workable approach: mix at a lower setting to keep the session responsive, then raise it before you commit. If you are printing a master, use a higher setting, because the difference is most audible exactly where masters live, on dense, bright, hard-driven material.
Confirm it before you commit
Saturation flatters immediately and fatigues slowly, which makes it the easiest process to overapply. Three habits protect you.
Gain match every comparison. Use the gain-match function rather than eyeballing a fader. An unmatched A/B will tell you every setting is an improvement.
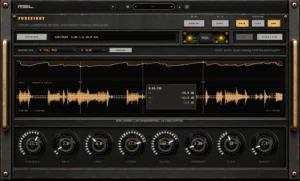
Monitor the residual. Listening to the difference between input and output lets you hear the distortion in isolation instead of guessing at it underneath the music. If the residual sounds harsh on its own, it is harsh in the mix. You just have not noticed yet.
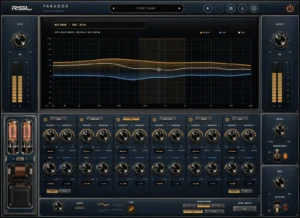
Watch harmonic content, not the drive percentage. The spectrum, harmonic-content and RTA harmonic-injection displays show what you are actually generating. Two sources at identical drive settings can produce very different harmonic profiles.
Three starting points
Drum bus. Bus mode. Crossover below the snare fundamental. Something restrained on the low core so the kick keeps its shape, something more aggressive above it for stick and air. Match law while you set it.
Vocal stem. Stem mode. Crossover in the low mids to keep chest weight out of the drive. Warm or Tube on the upper core for presence without an EQ boost. Small Focus adjustment if a stacked arrangement has narrowed.
Master. Master mode, higher oversampling, ceiling set for true peak. Modest drive on both cores, considerably less than feels right at first, and a transformer voicing chosen at the end. Confirm in Match, check in mono, then walk away and listen again tomorrow.
Key takeaways
- Set the crossover before touching drive. It is upstream of both cores and changes everything downstream.
- Pair the cores rather than choosing characters independently. Restraint below, character above, is a reliable default.
- Make decisions in Match and switch to Push only when you want the level.
- Tilt corrects the tonal shift saturation introduces; Focus corrects the narrowing.
- Raise oversampling before committing, especially on bright, dense masters.
- Gain match and monitor the residual, or you will overdo it and only hear it tomorrow.
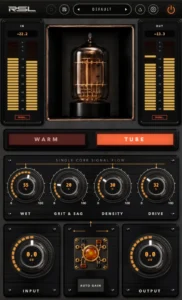
The Dual Core Saturator runs on macOS 11 or newer as a Universal 2 build for Intel and Apple Silicon, in Audio Unit, VST3, AAX and Standalone formats, and on Windows 10 or newer as VST3 and Standalone. If you want to hear the same Warm and Tube circuit on a single core first, RSL One is free and needs no license key. For more on why we model behavior rather than specific machines, see why digital saturation still needs analog attitude, or compare both plugins on the plugins page.